The Ultimate Guide to Making the Perfect Banana Split Cake
Every slice of banana split cake brings back summer memories. It was the star of family gatherings when I was young. This no-bake ice cream cake united us with its creamy layers and classic tastes.
The banana split cake is more than a dessert. It’s a journey that turns the banana split sundae into a stunning layered treat. It’s easy to make and hard to resist, perfect for any celebration.
This dessert started with the banana split in Latrobe, Pennsylvania, in 1904. Now, it’s a no-bake favorite that wins hearts everywhere. Its simple making and tasty flavors make it a twist on a classic.
Table of Contents
Understanding the Classic Banana Split Cake
A delightful sundae cake, the banana split cake, has won hearts for generations. It turns the beloved frozen dessert into a tasty layered treat. This dessert brings together the classic flavors of a traditional ice cream sundae in a shareable format.
The banana split cake’s origins date back to the early 1900s. It was invented in Latrobe, Pennsylvania. It quickly became a favorite American dessert, inspiring many variations.
Origins and Evolution
What began as a simple ice cream shop creation has become a beloved frozen dessert. Home bakers have embraced it with passion. The banana split cake is a creative way to enjoy the original sundae in a more portable and shareable way.
- Originated in early 20th-century ice cream parlors
- Evolved from traditional banana split sundaes
- Adapted by home bakers for family gatherings
What Makes it Special
Your banana split cake is a unique culinary creation. It combines multiple textures and flavors. It’s more than a dessert; it’s a nostalgic journey through classic American sweet treats.
| Characteristic | Description |
|---|---|
| Flavor Profile | Combines sweet, creamy, and fruity elements |
| Texture | Layered with crunchy and smooth components |
| Visual Appeal | Colorful and reminiscent of a classic sundae |
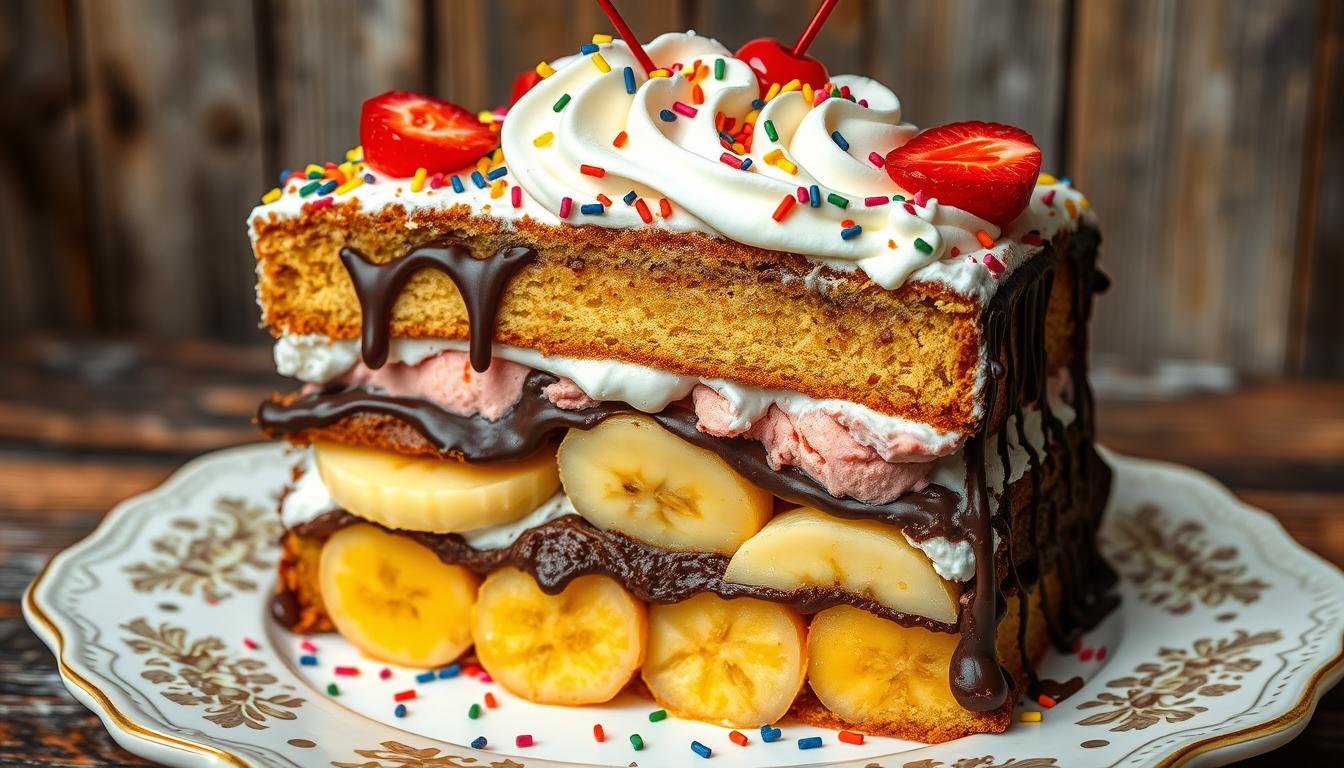
Key Components of a Traditional Recipe
A traditional banana split cake includes several essential layers. Each layer is crucial for the perfect dessert experience.
- Graham cracker crust
- Cream cheese layer
- Fresh banana slices
- Pineapple topping
- Whipped cream layer
- Chocolate and cherry garnish
“The banana split cake is more than a dessert – it’s a delicious memory of summer days and ice cream parlors.” – Dessert Enthusiast
If you love classic frozen desserts or want to try something new, the banana split cake is perfect. Its layers of flavor and texture make it a standout dessert for any occasion.
Essential Ingredients for Success
To make a perfect banana dessert, you need the right ingredients. They should add flavor and texture to your cake. Whether you’re new to baking or have lots of experience, knowing what to use is crucial.
Here’s what you’ll need to turn a simple dessert into a masterpiece:
- Graham cracker crumbs (2 cups)
- Unsalted butter (1/3 cup)
- Cream cheese (16 ounces)
- Powdered sugar
- Vanilla extract
- Fresh bananas (2-3 ripe bananas)
- Crushed pineapple (8 ounces)
- Fresh strawberries
- Whipped topping (2 cups)
- Chocolate syrup
- Maraschino cherries
Pro tip: Choose ingredients at their best to enhance your banana dessert’s flavor.
“The secret to an amazing layered cake is using high-quality, fresh ingredients” – Pastry Chef Recommendation
When picking your ingredients, focus on the quality of cream cheese and banana ripeness. A ripe banana (about 155g) adds the perfect sweetness and texture. Your cream cheese should be soft and smooth for a creamy cake.
Ingredient Selection Insights
| Ingredient | Quantity | Purpose |
|---|---|---|
| Graham Cracker Crumbs | 2 cups | Creates a crisp, flavorful base |
| Cream Cheese | 16 ounces | Provides creamy texture |
| Bananas | 2-3 ripe bananas | Adds natural sweetness |
The quality of your ingredients greatly affects your banana split cake. Spend time picking fresh, high-quality items for a dessert that will be remembered.
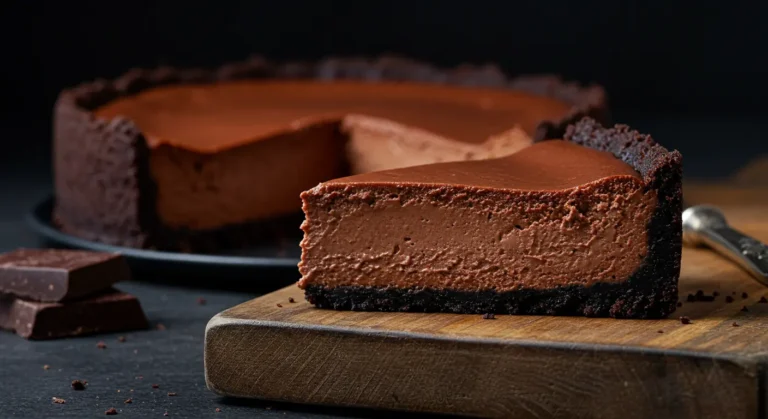
The Perfect Base: Creating the Graham Cracker Crust
Building a delicious banana split cake starts with a solid foundation. The graham cracker crust is your chocolatey treat’s crucial first layer. It sets the stage for a mouthwatering dessert that will impress your guests.
Creating the perfect graham cracker crust requires precision and a few key ingredients. You’ll need:
- 2 cups graham cracker crumbs (about 14 whole crackers)
- ½ cup melted unsalted butter
- ¼ cup white sugar
Crust Preparation Techniques
Start by crushing your graham crackers into fine crumbs. A food processor works best, but a rolling pin can also do the job. Mix the crumbs with melted butter and sugar until the mixture resembles wet sand.
“The key to a great crust is making sure every crumb is perfectly coated and compressed.”
Tips for a Firm Foundation
Press the mixture firmly into a 9×13-inch baking dish. Use the back of a measuring cup or your fingers to create an even layer. Refrigerate the crust for 15-20 minutes before adding your filling to help it set.
| Ingredient | Quantity | Purpose |
|---|---|---|
| Graham Cracker Crumbs | 2 cups | Base of the crust |
| Melted Butter | ½ cup | Binding agent |
| White Sugar | ¼ cup | Added sweetness |
Common Crust Variations
For a chocolatey treat twist, try substituting some graham crackers with chocolate cookie crumbs. You can also add chopped nuts like pecans or walnuts for extra texture and flavor.
Pro tip: Ensure your butter is completely melted and mixed thoroughly to prevent a crumbly or dry crust.
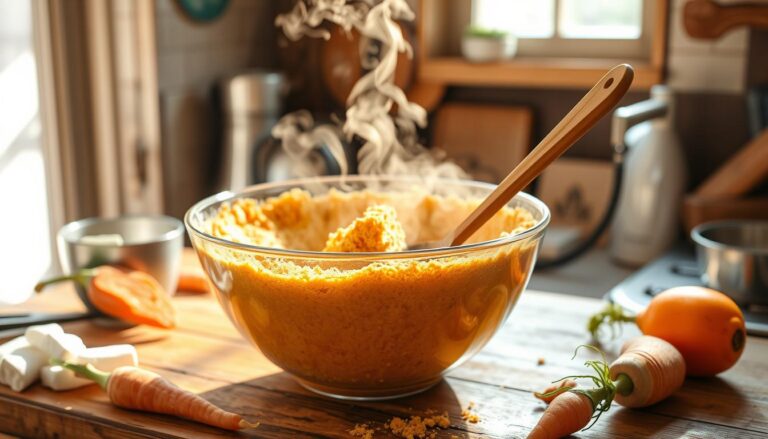
Mastering the Creamy Layer
Making the perfect creamy layer is key to a great banana split cake. The cream cheese mixture adds flavor and texture. It turns a simple dessert into a memorable treat.
- Use room temperature cream cheese for the best smoothness
- Measure 16 oz of cream cheese exactly
- Add 1½ cups of powdered sugar
- Include a splash of vanilla extract for extra flavor
“The secret to a perfect cream cheese layer is patience and proper mixing technique.”
Mixing is an art when making your sweet indulgence. Begin by beating the cream cheese until it’s light and fluffy. Then, add powdered sugar slowly to avoid lumps. For a unique twist, try adding lemon zest or almond extract.
Challenges can happen while preparing. A lumpy texture might come from cold cream cheese or too much mixing. To avoid this, let ingredients warm up and mix with a hand mixer on medium speed.
| Ingredient | Quantity | Purpose |
|---|---|---|
| Cream Cheese | 16 oz | Base of creamy layer |
| Powdered Sugar | 1½ cups | Sweetness and texture |
| Vanilla Extract | 1 tsp | Enhanced flavor |
Your aim is a silky-smooth layer that goes well with the graham cracker crust and fruit. With practice, you’ll get this part of your banana split cake just right.
Fruit Selection and Preparation
Creating the perfect banana split cake starts with picking the freshest, most vibrant fruits. Your summer delight depends on choosing ingredients that will make your dessert both visually stunning and deliciously memorable.
Choosing Perfectly Ripe Bananas
Choosing the right bananas is key for your summer delight. Look for bananas that are bright yellow with minimal brown spots. They should be firm yet slightly soft when gently pressed. Avoid bananas with extensive bruising or dark patches.
- Select bananas with even yellow coloration
- Choose fruits that yield slightly to gentle pressure
- Avoid bananas with extensive bruising
Exploring Additional Fruit Options
While bananas are the star, your summer delight can shine with additional fruits. Consider incorporating:
- Fresh strawberries
- Crushed pineapple
- Sliced mangoes
- Fresh raspberries
Preventing Fruit Oxidation
To keep your fruits looking fresh and appetizing, use these simple techniques:
- Brush banana slices with lemon juice
- Drain canned fruits thoroughly
- Prepare fruits just before assembling the cake
“The secret to a perfect summer delight is using the freshest fruits and preparing them with care.”
Your banana split cake will be a stunning centerpiece that captures the essence of a delightful summer dessert. By carefully selecting and preparing your fruits, you’ll create a memorable treat that looks as amazing as it tastes.
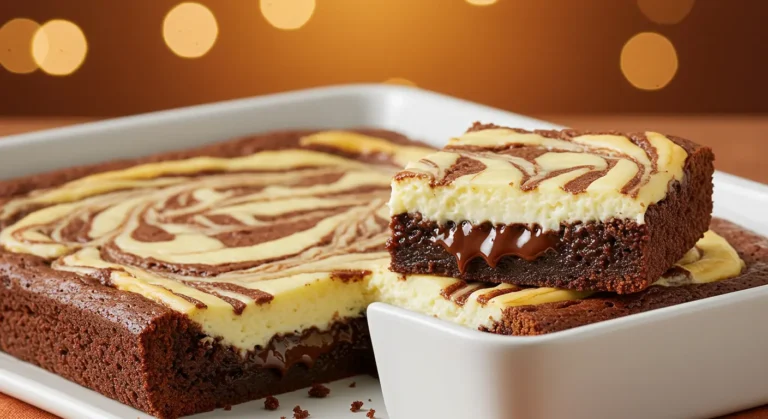
The Art of Layering Your Banana Split Cake
Making a stunning layered cake is all about precision and technique. Your banana split cake turns into a masterpiece with each layer. It’s all about building a dessert that looks good and tastes amazing, just like the classic banana split.
- Maintaining even layer thickness
- Controlling temperature during assembly
- Ensuring proper ingredient distribution
- Creating distinct flavor profiles
Begin with a solid graham cracker crust. Spread the cream cheese mixture evenly. Then, place sliced bananas on top, making sure they cover the whole area.
| Layer | Recommended Thickness | Technique |
|---|---|---|
| Graham Cracker Crust | 1/4 inch | Press firmly and evenly |
| Cream Cheese | 1/2 inch | Spread with offset spatula |
| Banana Slices | 1/4 inch | Arrange in single layer |
Pro tip: Chill each layer for 15-20 minutes between additions to maintain structural integrity and prevent mixing.
“Layering is an art form that transforms a simple dessert into a culinary masterpiece” – Pastry Chef Emma Roberts
As you add crushed pineapple, whipped cream, and garnishes, your cake will get more complex. It’s all about patience and paying close attention to every detail.
Refrigeration is key. Let your cake set for at least 2 hours. This lets the flavors mix and the texture become just right.
Creating the Perfect Whipped Topping
Making the ultimate whipped topping can take your ice cream cake to the next level. It’s perfect for any frozen dessert or banana split cake. The right topping can make all the difference.
Your whipped topping is the crowning glory of your dessert. Professional bakers know that texture and stability are key. They make your treat stand out.
Homemade vs Store-bought Options
When choosing your whipped topping, you have two main options:
- Homemade Whipped Cream
- Fresh, pure ingredients
- Control over flavor
- Less preservatives
- Store-bought Whipped Topping
- Quick and easy
- Consistent texture
- Longer shelf life
Stabilizing Techniques
To keep your whipped topping perfect, try these tips:
- Chill your mixing bowl and whisk before whipping
- Add a teaspoon of powdered sugar per cup of heavy cream
- Use a small amount of gelatin for extra stability
“The secret to perfect whipped topping is patience and technique” – Pastry Chef Recommendation
Follow these tips to make a light, airy topping. It will turn your frozen dessert into a masterpiece.
Decorative Toppings and Garnishes

To make your banana split cake stand out, you need creativity and the right garnishes. The right toppings can turn a simple cake into a stunning masterpiece. It’s all about making it visually appealing and delicious.
Professional bakers know that how a cake looks matters a lot. In fact, 55% of people are willing to pay more for cakes that look great. Your sundae cake should have decorations that catch the eye and add to its taste.
Classic Topping Combinations
- Chocolate syrup drizzles
- Maraschino cherries
- Chopped toasted pecans
- Rainbow candy sprinkles
When picking toppings, think about texture and taste. Contrast is key. You want crunchy nuts with creamy layers and bright sprinkles against dark chocolate.
| Topping Category | Recommended Options | Visual Impact |
|---|---|---|
| Sauces | Hot fudge, caramel, strawberry | High contrast, dramatic drizzles |
| Crunchy Elements | Chopped nuts, graham cracker crumbs | Textural complexity |
| Decorative Touches | Sprinkles, edible glitter, mini chocolate chips | Playful, festive appearance |
“A perfectly garnished cake tells a story before the first bite is taken.” – Pastry Chef Emma Rodriguez
For special events, make your toppings unique. Use birthday-themed sprinkles or holiday colors for holidays.
About 70% of professional bakers say presentation boosts customer happiness. Your sundae cake’s decorations are more than looks. They’re an invitation to enjoy a treat.
No-Bake Version: Quick and Easy Method
Craving a delightful banana dessert that requires zero oven time? The no-bake banana split cake is your ultimate summer delight! This refreshing treat brings together simplicity and deliciousness, perfect for those hot days when turning on the oven sounds unbearable.
With just 30 minutes of prep time, you can create a mouthwatering dessert that serves 12 hungry guests. The beauty of this no-bake method lies in its incredible ease and minimal ingredients.
Time-Saving Techniques
Streamline your banana dessert preparation with these quick techniques:
- Use pre-made graham cracker crusts for instant convenience
- Opt for instant pudding mixes to reduce preparation time
- Utilize pre-whipped cream or whipped topping
- Prepare layers in advance and refrigerate
Storage Tips
Maximize your summer delight’s shelf life with these storage recommendations:
- Refrigerate immediately after assembling
- Cover tightly with plastic wrap
- Store for 2-3 days in the refrigerator
- Freeze for up to 1 month for longer preservation
“A perfectly chilled no-bake banana split cake is summer’s most delicious answer to heat!” – Dessert Enthusiasts Magazine
Pro tip: Always use ripe bananas for the most intense flavor. The 13×9-inch dish works best for optimal layering and easy transportation to your next summer gathering.
Troubleshooting Common Issues
Making the perfect banana split cake can be tricky. Even skilled bakers face problems that affect their cakes. Knowing common issues helps make a tasty dessert every time.
Preventing Typical Challenges
When baking your banana split cake, you might run into a few issues:
- Soggy graham cracker crust
- Bananas turning brown quickly
- Runny cream cheese layers
- Uneven cake texture
Crust Rescue Techniques
To avoid a soggy crust, follow these steps:
- Pat fruits dry with paper towels
- Pre-toast graham cracker crust for extra firmness
- Use a light layer of cream cheese as a moisture barrier
“A great banana split cake starts with a perfectly prepared crust!” – Baking Experts
Fruit Preservation Tricks
To keep bananas fresh in your cake, try this:
Pro tip: Toss banana slices in pineapple juice to prevent browning. This method uses natural acids to slow down browning.
Cream Layer Solutions
For a stable cream cheese layer, follow these tips:
- Ensure cream cheese is room temperature
- Mix at medium speed until light and fluffy
- Chill the cake for at least 4 hours before serving
With these tips, you’ll make a stunning banana split cake that wows everyone!
Special Dietary Variations
Making a tasty banana dessert for special diets is easy. You can change it to fit different nutritional needs. This way, everyone can enjoy this classic treat.
Managing dietary restrictions or looking for healthier options? These tips will help you make a banana split cake that’s tasty and welcoming for all.
Gluten-Free Adaptations
Want to avoid gluten? It’s simple to change the recipe:
- Swap graham crackers for gluten-free options like almond flour or gluten-free cookie crumbs
- Use cornstarch or arrowroot instead of wheat-based thickeners
- Make sure to check all labels for hidden gluten
Vegan Alternatives
Make your banana dessert vegan by swapping out ingredients:
- Replace cream cheese with cashew-based cream cheese
- Choose coconut whipped cream over dairy whipped cream
- Use chia or flax seed instead of eggs
Low-Sugar Options
Lower the sugar without losing flavor with these tips:
- Try natural sweeteners like stevia or monk fruit
- Add fresh fruits for sweetness
- Use Greek yogurt for a protein-rich, lower-sugar base
“Dietary restrictions don’t mean dessert restrictions – creativity is the key to delicious adaptations.”
Each change needs careful ingredient picking and measuring. Experiment and adjust to find your perfect balance of flavor and nutrition.
Seasonal Adaptations and Variations

Turn your classic ice cream cake into a year-round treat. Each season offers a chance to make it new again. This makes it perfect for any time of the year.
Summer Sensations
In summer, add tropical twists to your banana split cake. Try these refreshing changes:
- Add fresh mango or passionfruit layers
- Incorporate coconut sorbet between cake layers
- Garnish with grilled pineapple chunks
Autumn Inspirations
Bring in fall flavors with warm spices and seasonal ingredients:
- Sprinkle cinnamon and nutmeg into the cream layer
- Use roasted pecans as a crunchy topping
- Drizzle caramel sauce for extra richness
Winter Wonderland Edition
Make your summer treat festive for winter:
- Add peppermint extract to the whipped cream
- Incorporate white chocolate shavings
- Create red and green color schemes for holiday appeal
“A great dessert adapts like a chameleon, reflecting the spirit of each season!” – Pastry Chef Recommendation
Your banana split cake can be a versatile treat all year. Try new flavors, colors, and ingredients. This keeps your classic dessert exciting and fresh!
Serving Suggestions and Presentation Tips
Turning your sundae cake into a stunning centerpiece is all about the details. The right way to serve it can make it unforgettable. It’s not just about the taste, but also how it looks.
For perfect slices, follow these tips:
- Use a sharp, clean knife warmed under hot water
- Wipe the blade between each cut for crisp edges
- Chill the cake for at least 4 hours before serving
Presenting your banana split cake is like creating art. For elegant servings, use a rectangular plate and add garnishes. A classic way is to:
- Place a clean slice slightly off-center
- Add a scoop of vanilla ice cream beside the slice
- Drizzle warm chocolate sauce in a creative pattern
Garnishes can make your sundae cake a true masterpiece. Pro tip: Top each slice with a maraschino cherry for a nostalgic touch that adds visual appeal and traditional flavor.
“Presentation is not just about making food look beautiful, it’s about creating an experience.” – Culinary Expert
The aim is to make a dessert that pleases both the eyes and taste buds. With these tips, your banana split cake will impress everyone every time.
Storage and Make-Ahead Guidelines
Keeping your banana dessert fresh is key. The right storage keeps it tasty and smooth. Learn how to enjoy your banana split cake at its best.
Your banana split cake needs special care. We’ll look at the best ways to store it. This way, your dessert stays fresh and yummy.
Refrigeration Techniques
Here’s how to store your banana dessert in the fridge:
- Always use an airtight container
- Cover the cake completely to prevent moisture absorption
- Store at 40°F or below
- Consume within 3-4 days for optimal freshness
Freezing Instructions
Freezing makes your dessert last longer. Here are some freezing tips:
| Storage Method | Duration | Quality Preservation |
|---|---|---|
| Refrigerator Storage | 3-4 days | Good |
| Freezer Storage | 2-3 weeks | Excellent |
Make-Ahead Preparation Tips
For the best banana split cake, try these make-ahead tips:
- Prepare the crust up to 2 days in advance
- Layer ingredients just before serving
- Keep toppings separate until serving time
- Thaw frozen cake in the refrigerator for 2-3 hours
Pro tip: Always let your frozen dessert sit at room temperature for 10-15 minutes before serving. This makes it creamier.
Follow these storage tips to keep your banana split cake a hit. It will look and taste like it was just made.
Professional Tips for Restaurant-Quality Results
To make a banana split cake like a pro, you need some insider tricks. These tips can turn your homemade treat into a professional masterpiece. Bakers know that being precise and presenting well are crucial.
- Use a cake comb or acetate strips to create perfectly smooth layers
- Master chocolate curl techniques for elegant decorations
- Practice professional whipped cream piping methods
“The difference between good and great is in the details” – Professional Pastry Chef
Getting the flavors right is an art. Bakers suggest these tips:
- Try out different flavor combinations
- Be careful with how sweet you make it
- Choose the best ingredients you can find
| Technique | Professional Tip | Difficulty Level |
|---|---|---|
| Layer Creation | Use acetate strips for clean edges | Intermediate |
| Decoration | Create chocolate curls with room temperature chocolate | Advanced |
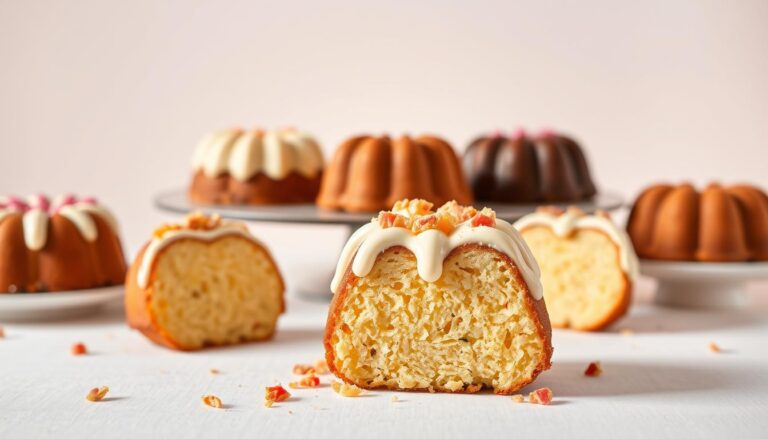
| Flavor Enhancement | Balance sweet and tangy elements | Beginner |
How you present your dessert can make a big difference. Try serving it in fancy ramekins or making a deconstructed version. This way, you can show off each ingredient’s unique taste and texture.
Pro tip: Practice makes perfect when mastering these professional techniques!
Conclusion
Your journey to make the perfect banana split cake shows how a simple dessert can become a masterpiece. This cake is more than a sweet treat. It’s a chance to show off your creativity and personal touch in the kitchen.
Whether it’s for a family gathering or a summer picnic, this dessert is a hit. It’s quick to make, serving up to 20 people, and won’t break the bank. Each serving costs less than $1, making it perfect for all bakers.
The secret to a great banana split cake is in its layers and ingredients. From the graham cracker crust to the ripe fruits and creamy filling, every step is a chance to add your own twist. Feel free to try new things, like using seasonal fruits or making it for special diets.
As you keep working on your banana split cake skills, you’ll see it’s more than a recipe. It’s a way to bring people together, make memories, and enjoy the fun of baking at home.