“Homemade Red Velvet Cake Ice Cream Recipe: Creamy & Delicious
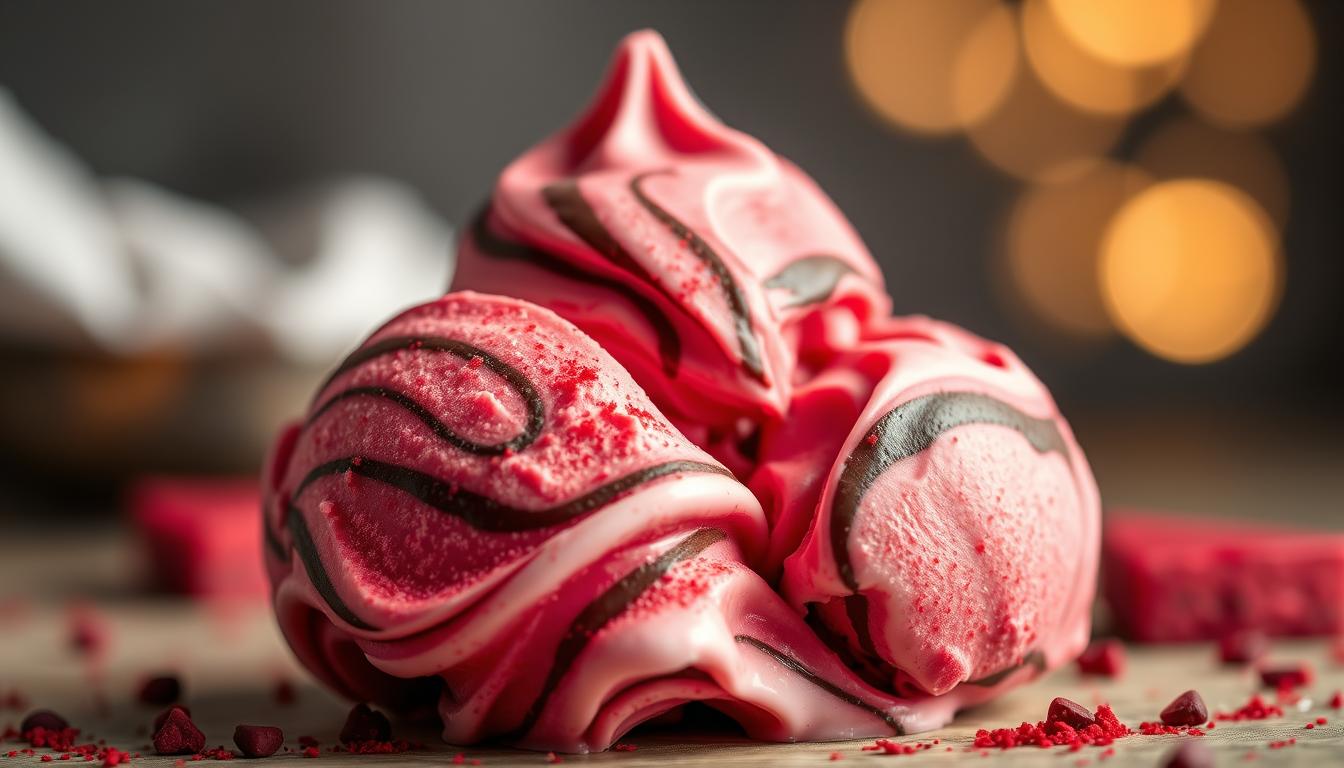
Imagine diving into a creamy dessert that captures the essence of your favorite red velvet cake. It’s transformed into a luxurious frozen treat. Red velvet cake ice cream isn’t just a dessert. It’s an experience that combines the rich, velvety texture of classic red velvet with the cool, smooth sensation of homemade ice cream.
As summer approaches or you’re craving a decadent indulgence, this red velvet cake ice cream recipe will become your new obsession. The deep chocolate undertones, subtle tanginess, and vibrant red color create a dessert that’s both visually stunning and incredibly delicious.
Whether you’re a seasoned home baker or a curious dessert enthusiast, this recipe promises to deliver a restaurant-quality treat right from your own kitchen. Get ready to impress your friends and family with a creamy dessert that’s sure to become a new favorite.
Table of Contents
Introduction to Red Velvet Cake Ice Cream
Red velvet is more than a dessert; it’s a journey for your taste buds. It combines rich chocolate with a tangy twist. This mix turns cake into a frozen delight.
The magic of red velvet cake ice cream is in its taste. It’s not just chocolate ice cream. Instead, it offers a subtle chocolate flavor that’s smooth on your tongue. The cream cheese swirl adds a tangy touch that makes it even better.
The Origin of Red Velvet Flavor
Red velvet’s story is as rich as its flavor. It started in the early 1900s, rooted in Southern baking. It’s known for:
- Subtle cocoa undertones
- Vibrant red color
- Tangy cream cheese frosting
- Smooth, velvety texture
Why This Recipe is Special
Our red velvet cake ice cream recipe turns a classic into a frozen treat. It balances chocolate with a creamy swirl. This mix honors the traditional cake while adding a cool twist.
Red velvet is more than a flavor – it’s a culinary art form that continues to evolve and delight dessert enthusiasts.
Online searches for “Red Velvet Cake” have jumped by 150% in recent years. Our recipe brings this excitement to life. It offers a gourmet twist that’s both nostalgic and new.
Essential Ingredients for Perfect Red Velvet Ice Cream
Making red velvet cake ice cream is a journey. It starts with picking the right ingredients. These ingredients will mix to create a smooth, flavorful treat.
The base of your ice cream is top-notch dairy. You’ll need:
- Heavy whipping cream (1 1/2 cups)
- Whole milk (1 1/2 cups)
- Cream cheese (8 ounces)
- Granulated sugar (1 1/2 cups)
- Vanilla bean paste
- Red gel food coloring
Each part is vital for the red velvet taste and creamy feel. The cream cheese adds a tangy touch, like the cake’s frosting. The heavy cream makes it smooth and luxurious.
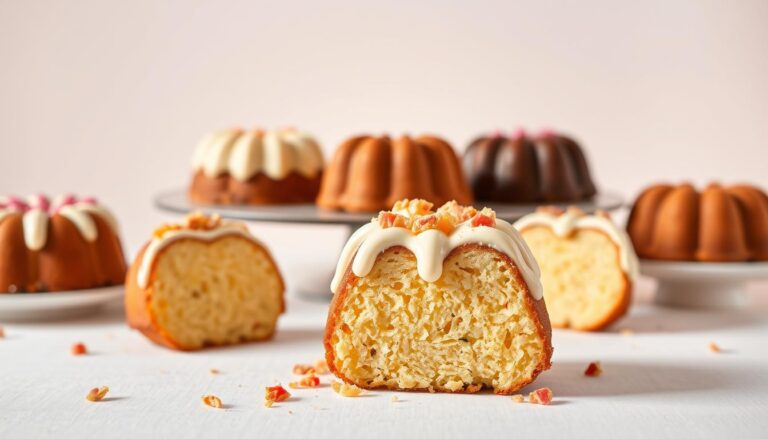
For a true red velvet taste, add red velvet cake crumbs. They bring depth and a fun texture to your treat.
Pro tip: Choose the best ingredients for amazing ice cream. Quality makes a big difference in taste and texture.
Equipment and Tools Needed
Making the perfect red velvet cake ice cream needs the right tools. Whether you’re experienced or new, the right gear makes a big difference. It turns your frozen treat into something truly special.
Starting your homemade ice cream journey means picking the right equipment. The good news is you have many options to make your dream come true.
Ice Cream Maker Options
An ice cream maker is key for a smooth, creamy treat. Here are some top picks:
- Countertop electric ice cream makers
- Compressor-style machines
- Manual hand-crank models
- Attachment for stand mixers
Alternative No-Churn Methods
Don’t have an ice cream maker? No worries! You can still make delicious red velvet cake ice cream with these methods:
- Electric mixer technique
- Whisk and arm strength method
- Blender or food processor approach
Storage Containers
Storing your ice cream right keeps it fresh and tasty. Here are some good container choices:
| Container Type | Pros | Best For |
|---|---|---|
| Airtight Plastic | Lightweight, affordable | Short-term storage |
| Glass Containers | Prevents freezer burn, non-reactive | Long-term preservation |
| Specialty Ice Cream Containers | Designed for optimal freezing | Professional-style storage |
Pro tip: Pick a container with a tight-fitting lid. It keeps your ice cream creamy and prevents ice crystals.
Step-by-Step Preparation Guide
Making the perfect cocoa-infused frozen custard needs care and love. Your red velvet cake ice cream adventure starts with picking the right ingredients. Then, follow a step-by-step guide to blend and freeze.
Begin by getting your base ingredients ready with these key steps:
- Measure out 36g of cocoa powder for rich chocolate undertones
- Combine 322g of buttermilk for creamy consistency
- Add 8g of red gel food coloring for signature vibrant color
- Incorporate 2 ½ teaspoons of apple cider vinegar for subtle tang
To make the most decadent cocoa-infused frozen custard, follow these important mixing steps:
- Whisk dry ingredients thoroughly to prevent lumps
- Blend wet ingredients until smooth and uniform
- Gradually combine wet and dry mixtures
- Strain the mixture to ensure silky texture
Pro tip: Consistency is key when creating your frozen dessert. Take your time and mix with care to achieve that perfect velvety smoothness.
“The secret to great ice cream is patience and precision” – Artisan Ice Cream Maker
Your preparation time should be about 30 minutes. Freezing will take an extra 4-6 hours. This will give your homemade red velvet cake ice cream the perfect texture.
Making the Perfect Red Velvet Base
To make stunning ruby-hued ice cream, you need to be precise and pay attention to detail. The secret is using top-notch ingredients and blending them just right. This ensures your ice cream looks and tastes amazing.
- Use gel food coloring for vibrant red without altering texture
- Select high-quality cocoa powder
- Balance chocolate intensity carefully
- Aim for a rich, smooth consistency
Achieving the Right Color
Getting the right color for your ice cream is all about precision. Experts suggest using gel food coloring for a deep red without affecting the texture. Start with a little and add more until you get the perfect shade.
Balancing Cocoa Flavors
Cocoa is key to your ice cream’s red velvet taste. Here’s a guide for the best flavor:
| Ingredient | Recommended Quantity | Purpose |
|---|---|---|
| Cocoa Powder | 1-2 tablespoons | Enhance chocolate depth |
| Vanilla Extract | 1 teaspoon | Balance flavor complexity |
| Baking Soda | Pinch | Improve texture and flavor |
Try these amounts to make a ruby-hued ice cream that tastes like classic red velvet cake. Remember, using the best ingredients is crucial for a great dessert.
Cream Cheese Integration Techniques
Making the perfect cream cheese swirl in red velvet cake ice cream needs skill. The secret to a smooth texture is how you mix the cream cheese with the ice cream base.
Begin by getting your cream cheese ready. Use full-fat cream cheese that’s at room temperature. It should be soft and almost melted. This makes the mixture smooth and boosts the flavor and texture of your ice cream.
- Use 8 oz (227 g) of cream cheese at room temperature
- Soften cream cheese for at least 30 minutes before mixing
- Ensure cream cheese is completely smooth with no lumps
To mix the cream cheese swirl, follow these steps:
- Whip the cream cheese until it’s smooth
- Gently fold the cream cheese into the ice cream base
- Make beautiful swirls with a spatula or knife
| Technique | Result |
|---|---|
| Cold Cream Cheese | Lumpy, uneven texture |
| Room Temperature Cream Cheese | Smooth, velvety texture |
| Overmixing | Loses distinct swirl pattern |
| Gentle Folding | Maintains beautiful cream cheese swirls |
Experts say to add the cream cheese swirl when churning is almost done. This keeps the swirls distinct and spreads the flavor evenly in your red velvet cake ice cream.
How to Achieve the Perfect Velvety Texture
To make a creamy dessert, you need to know ice cream science. The success of your red velvet cake ice cream depends on controlling temperature and churning techniques.
Getting a smooth, luxurious ice cream starts with careful preparation. You want your dessert to feel like silk and melt perfectly.
Temperature Control Strategies
Temperature is key for a velvety texture. Here are some tips:
- Chill your base well before churning (2 hours recommended)
- Keep ingredients between 35-40°F for the best consistency
- Use an instant-read thermometer to check temperatures
- Pre-chill your ice cream maker bowl for at least 24 hours
Churning Time Guidelines
Churning turns your liquid base into a creamy dessert. The goal is to find the right churning time:
- Start churning at a low to medium speed
- Churn for 20-25 minutes for the best consistency
- Look for signs of thickening and slight expansion
- Stop when it looks like soft-serve ice cream
Pro tip: Avoid over-churning, which can make your ice cream grainy and less smooth.
No-Churn Red Velvet Cake Ice Cream Method
Making a rich, creamy ice cream without an ice cream maker is simple. This method turns basic ingredients into a treat that will wow everyone.
The key to great no-churn ice cream is heavy whipping cream and sweetened condensed milk. These ingredients make a smooth base, just like churned ice cream.
- Prep Time: 15 minutes
- Freeze Time: 8 hours
- Total Time: 8 hours 15 minutes
- Servings: 8 people
To make your no-churn red velvet cake ice cream, you’ll need these ingredients:
| Ingredient | Quantity |
|---|---|
| Cold Heavy Whipping Cream | 2 cups |
| Cream Cheese | 8 ounces |
| Sweetened Condensed Milk | 14 ounces |
| Vanilla Extract | 2 teaspoons |
| Red Gel Food Coloring | ¼ teaspoon |
Here’s how to make your no-churn red velvet cake ice cream:
- Whip the heavy cream until stiff peaks form (about 2½ minutes)
- Beat cream cheese until smooth
- Fold sweetened condensed milk and vanilla into cream cheese
- Gently fold whipped cream into mixture
- Add red gel food coloring for signature red velvet color
- Transfer to a freezer-safe container
- Freeze for 8 hours or overnight
Your homemade no-churn red velvet cake ice cream will last up to 2 weeks in the freezer. It’s a delicious dessert that’s easy to make but packed with flavor.
Adding Red Velvet Cake Crumbs

To make your red velvet cake ice cream amazing, you need the right cake crumbs. These crumbs turn a simple chocolate ice cream into a show-stopping dessert.
There are three main ways to get red velvet cake crumbs:
- Bake a fresh red velvet cake from scratch
- Use a convenient box mix
- Purchase pre-made store-bought cake
The secret to great red velvet cake ice cream is the crumb size and how they’re spread. You want small, even pieces for a fun texture in every bite.
Here’s how to prepare the crumbs:
- Let the cake cool down completely
- Crumble it into small, uniform pieces
- Spread the crumbs on a baking sheet
- Lightly toast them for a richer flavor
| Crumb Source | Preparation Time | Flavor Intensity |
|---|---|---|
| Homemade Cake | 40-45 minutes | Most Authentic |
| Box Mix | 25-30 minutes | Good |
| Store-Bought | 5-10 minutes | Convenient |
Pro tip: Freeze crumbs before mixing into your red velvet cake ice cream to prevent them from becoming soggy and maintain their delightful texture.
“The secret to extraordinary ice cream is in the details of its composition.” – Artisan Ice Cream Maker
Storage and Serving Recommendations
Making the perfect red velvet cake ice cream is just the start. Learning how to store and serve it is key to enjoying every bite. This creamy dessert is truly an indulgent treat.
Your homemade red velvet cake ice cream needs careful storage. This keeps its texture and flavor just right. Here are some important tips to keep your dessert perfect:
Optimal Freezing Techniques
- Store in an airtight container to prevent freezer burn
- Keep at a consistent temperature of 0°F (-18°C)
- Place in the coldest part of your freezer
- Consume within 2 weeks for peak quality
Smart Serving Suggestions
To make your red velvet cake ice cream unforgettable, try these serving tips:
- Remove the ice cream from the freezer 5-10 minutes before serving
- Use a warmed ice cream scoop for smooth, perfect portions
- Garnish with fresh red velvet cake crumbs
- Pair with a sprinkle of cocoa powder or chocolate shavings
Pro tip: For a fancy presentation, serve in chilled glasses or vintage dessert bowls. Your guests will love the flavor and the elegant look of this treat.
Troubleshooting Common Issues
Making the perfect red velvet cake ice cream can be tricky. You might face texture and consistency problems. These can affect the ice cream’s smoothness and quality.
Common Ice Cream Problems and Solutions
- Ice Crystal Formation: Stop unwanted crystals by using the right churning and storage methods
- Grainy Texture: Keep it smooth by tempering ingredients carefully
- Color Fading: Keep the red color bright with the right food coloring
Temperature control is key when making red velvet cake ice cream. Quick temperature changes can ruin the smooth texture you want.
“The secret to perfect ice cream lies in understanding its scientific nuances.” – Culinary Experts
Specific Troubleshooting Techniques
- Always chill your ice cream base before churning
- Choose high-fat dairy for a smoother taste
- Keep air out during freezing
- Store it at a steady 0°F
By following these tips, you’ll make a delicious cocoa-infused frozen custard. It will keep its rich flavor and smooth texture as it freezes.
Variations and Creative Toppings
Turn your decadent frozen delight into a masterpiece with these exciting red velvet cake ice cream variations. The ruby-hued ice cream is a perfect canvas for your creativity.

Make your dessert experience even better with these delightful mix-ins and toppings:
- Chocolate Lovers Edition: Fold in dark chocolate chips or chocolate cookie crumbles
- Nutty Crunch: Sprinkle chopped pecans or toasted almonds for texture
- Marshmallow Dream: Add mini marshmallows for a soft, sweet surprise
- Cream Cheese Swirl: Create ribbons of cream cheese throughout the ice cream
For ultimate indulgence, try these topping combinations:
- Cream cheese frosting drizzle
- Crushed red velvet cake pieces
- White chocolate shavings
- Fresh raspberry compote
Don’t be afraid to try new things with your ruby-hued ice cream. Each variation adds a special twist to this decadent treat. You can make a dessert that shows off your personal taste and creativity.
Conclusion
Making your own red velvet cake ice cream is more than a recipe. It’s a fun journey in the kitchen. You turn simple things like milk, vanilla protein powder, and red velvet cake mix into a creamy treat. With just 20 minutes and a Ninja Creami, you can make a homemade ice cream that’s as good as any store.
This ice cream is great for any time. It’s perfect for a summer treat, a holiday dessert, or a quick sweet fix. You can add brownie bits or crushed cookies to make it your own. Or, try dairy-free options for different tastes.
Your homemade red velvet cake ice cream is more than a dessert. It shows off your creativity in the kitchen. By making this, you’re not just making ice cream. You’re creating a special treat to share with loved ones.
We encourage you to start this tasty adventure. Share your own twist on the recipe. And enjoy making a delicious creamy dessert right in your kitchen.