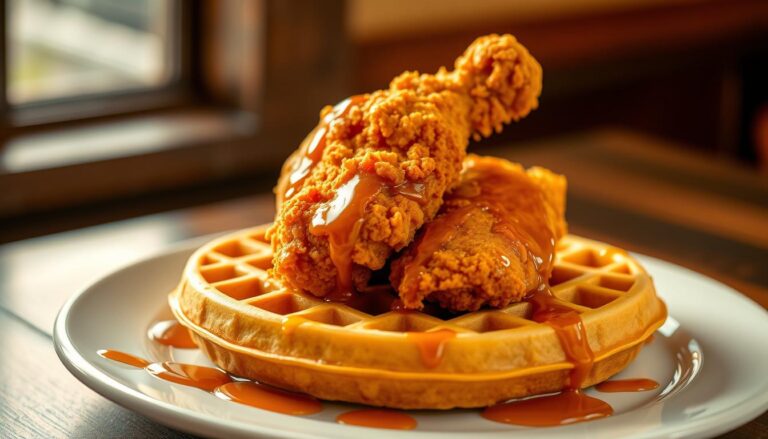
The Ultimate Guide to Delicious Rotisserie Chicken Recipe
Imagine a golden-brown rotisserie chicken spinning in your kitchen. Its skin is crisp and smells amazing. As someone who loves cooking, I’ve found that rotisserie chicken is more than food. It’s a journey into the world of flavors.
Rotisserie chicken is not just for dinner. It’s a key ingredient that makes meal planning easy. Whether you’re busy or just want to cook something tasty, this guide will show you how. You’ll learn to make delicious rotisserie chicken recipes that will be your favorite.
We’ll cover everything from the basics of rotisserie cooking to advanced techniques. You’ll see how one chicken can make many tasty meals. Get ready to improve your cooking skills and find out why rotisserie chicken is a kitchen superstar.
Table of Contents
Understanding the Magic of Rotisserie Chicken
Rotisserie chicken is a favorite in many American homes. It’s a tasty and easy meal solution. This cooking method turns a regular chicken into a juicy, flavorful dish that excites your taste buds and makes cooking simple.
Origins of Rotisserie Cooking
The art of rotisserie cooking goes back to medieval times. Back then, spit-roasting was a common way to cook. Today, the supermarket rotisserie chicken is a quick and delicious meal choice for many.
Advantages of Homemade Rotisserie Chicken
- Complete control over ingredients and seasoning
- Cost-effective compared to store-bought options
- Fresh, customizable flavor profiles
- Healthier alternative to processed foods
Supermarket Rotisserie vs. Homemade Comparison
| Aspect | Supermarket Rotisserie | Homemade Rotisserie |
|---|---|---|
| Cost | $5-$7 per chicken | $3-$5 per chicken |
| Flavor Customization | Limited | Unlimited |
| Nutritional Control | Pre-determined | Fully controllable |
| Preparation Time | Instant | 1-2 hours |
Supermarket rotisserie chickens are convenient, but homemade versions offer a more personal touch. With 80% of consumers preferring rotisserie chicken for its versatility, knowing both options helps in meal planning.
Pro tip: If you’re short on time, a supermarket rotisserie chicken can be an excellent base for multiple recipes, from salads to casseroles.
Essential Equipment and Tools for Perfect Rotisserie Chicken
To master rotisserie cooking, you need the right tools. Whether you’re cooking at home or love grilling, the right equipment makes a big difference. It affects the chicken’s taste and texture.
Here are the must-haves for rotisserie chicken:
- Rotisserie attachment for grill
- Dedicated rotisserie oven
- Heavy-duty meat thermometer
- Stainless steel basting brush
- Sturdy rotisserie spit
When picking your rotisserie setup, think about these important points:
- Budget: Prices range from $100 to $500
- Cooking space: Make sure it fits your grill
- Durability: Stainless steel lasts longer
“The right tool makes rotisserie cooking both an art and a science.” – Culinary Expert
A reliable meat thermometer is key. Choose digital ones that give instant readings. This ensures your chicken hits the safe 165 degrees F.
Professional chefs say quality equipment is crucial. It must distribute heat evenly and rotate consistently. This way, you get a juicy rotisserie chicken every time.
Selecting the Perfect Chicken for Rotisserie
Choosing the right chicken is key for a tasty rotisserie chicken. The quality of your chicken affects the flavor, texture, and success of your dish.
Size and Weight Considerations
The perfect chicken for rotisserie cooking weighs between 4.5 to 6.5 pounds. This size ensures even cooking and tender meat. Smaller chickens might dry out, while bigger ones could cook unevenly.
- Recommended weight range: 4.5 to 6.5 lbs
- Cooking time at 300°F:
- 4.5 to 5.5 lb chicken: approximately 2 hours 15 minutes
- 5.5 to 6.5 lb chicken: approximately 2 hours 30 minutes
Fresh vs Frozen Options
Fresh chickens are best for rotisserie recipes. Organic or free-range chickens offer better flavor and texture. If using frozen chicken, thaw it completely in the fridge.
Pro tip: Brining your chicken for 4-6 hours (preferably overnight) enhances moisture and flavor.
Quality Indicators to Look For
When picking your chicken, look for these quality signs:
| Indicator | What to Look For |
|---|---|
| Color | Consistent pink or yellowish tone |
| Texture | Firm, without excess liquid |
| Smell | Fresh, neutral odor |
| Packaging | Intact, no tears or leaks |
By choosing your chicken wisely, you’ll make a rotisserie chicken that will wow your family and friends.
Basic Rotisserie Chicken Recipe
Making a tasty rotisserie chicken is simpler than you think. With a few basic ingredients and techniques, you can turn a regular chicken into a delicious meal. It’s sure to impress your loved ones.
To start your rotisserie chicken recipe, you’ll need a few key ingredients:
- 1 whole chicken (approximately 3-4 pounds)
- 2 tablespoons softened butter
- 2 teaspoons kosher salt
- 1 teaspoon black pepper
- 1 teaspoon paprika
Getting your chicken ready is key for a great rotisserie chicken dinner. Make sure your chicken is dry and seasoned well before cooking. Pat the chicken dry with paper towels for that crispy, golden skin everyone loves.
| Ingredient | Quantity | Purpose |
|---|---|---|
| Whole Chicken | 3-4 lbs | Main protein |
| Butter | 2 tbsp | Moisture and flavor |
| Kosher Salt | 2 tsp | Seasoning |
| Black Pepper | 1 tsp | Spice |
| Paprika | 1 tsp | Color and mild flavor |
This rotisserie chicken recipe is a lifesaver for busy cooks. It’s ready in just 15 minutes, making it a quick and tasty meal. Plus, you can use leftovers in many dishes, making it a versatile choice for the week.
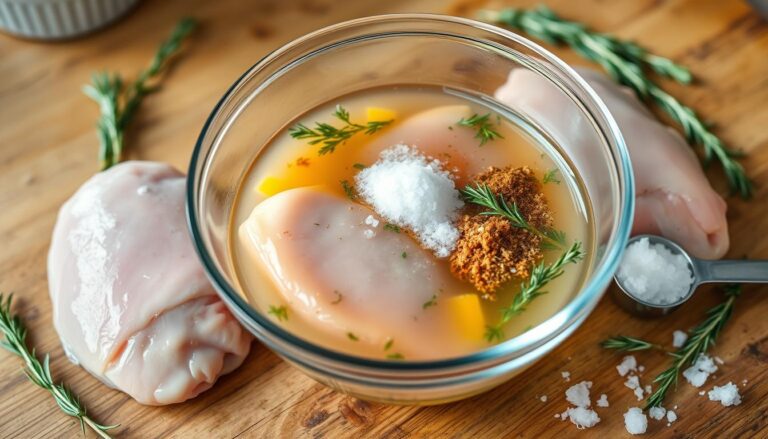
Secret Ingredients for Flavorful Marinade
Making the perfect chicken marinade is like a work of art. It turns a simple rotisserie chicken into a dish to remember. The right mix of ingredients can make your chicken taste amazing.
Marinades do more than just add flavor. They have a rich history. Did you know yogurt marinades started in the 13th century in the Mongolian Empire?
Essential Herb and Spice Combinations
When making your marinade, think about these great flavor pairs:
- Mediterranean Blend:
- Olive oil
- Lemon juice
- Dried oregano
- Garlic
- Asian-Inspired Mix:
- Soy sauce
- Ginger
- Sesame oil
- Chinese chili crisp
- North African Twist:
- Harissa paste
- Cumin
- Coriander
- Preserved lemon
Marinating Time Guidelines
The time you marinate your chicken matters a lot. Pro tip: Different acidic ingredients change meat in different ways.
“A 24-hour marinade of buttermilk and salt can produce an incredibly juicy bird with enhanced caramelization.” – Culinary Experts
Here are some marinating times to keep in mind:
- Yogurt-based marinades: 4-8 hours
- Citrus marinades: 2-4 hours
- Oil-based marinades: 30 minutes to 2 hours
- Buttermilk marinades: Up to 24 hours
But remember, too long can be bad. Acidic marinades can make chicken mushy if marinated too long.
Mastering the Perfect Chicken Rub
Making the perfect chicken rub is an art. It turns your rotisserie chicken into something amazing. The right seasoning can add layers of flavor that excite your taste buds.
Your chicken rub ingredients are key to a great meal. Professional chefs know a good rub balances flavors well:
- Salt (base flavor enhancer)
- Black pepper (sharp warmth)
- Paprika (sweet depth)
- Garlic powder (aromatic complexity)
- Dried herbs (regional character)
There are many ways to make a chicken rub. Here are some interesting styles:
- Mediterranean Rub: Blend 2 tablespoons sea salt, dried rosemary, and oregano
- West Indian Rub: Combine 1/4 cup dark brown sugar with 2 tablespoons sea salt
- Moroccan Rub: Mix 2 tablespoons sea salt and 1 tablespoon sweet paprika
“The secret to an unforgettable rotisserie chicken lies in your roast chicken seasoning.” – Professional Chef
When you put your rub on the chicken, make sure to cover it well. Let the chicken rest for 30 minutes before cooking. This lets the flavors soak in.
Step-by-Step Preparation Process
Preparing a rotisserie chicken needs careful steps. Start with cleaning and preparing the chicken. These steps are key to a tasty, evenly cooked meal that will wow your guests.
Cleaning and Trussing Techniques
Begin by cleaning your whole chicken well. Take out the giblets and dry the chicken with paper towels. Proper cleaning stops bacterial growth and keeps food safe.
- Rinse the chicken inside and out with cold water
- Pat completely dry with clean paper towels
- Remove excess fat and loose skin
- Trim any hanging pieces that might burn during cooking
“A well-prepared chicken is the foundation of great rotisserie cooking” – Professional Chef Recommendation
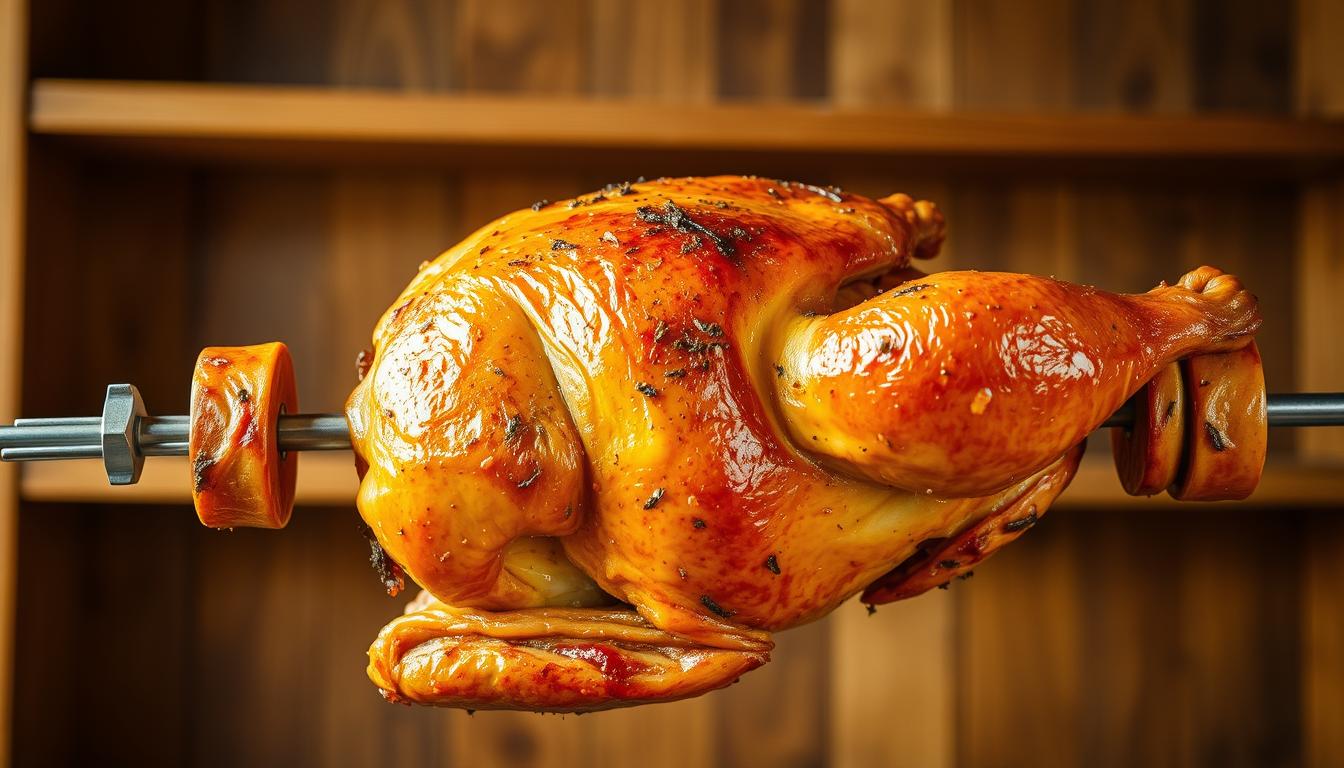
Mounting on Rotisserie Spit
Trussing is key for rotisserie cooking. It makes the chicken compact and balanced for smooth rotation.
- Use kitchen twine to tie the legs together
- Secure wings close to the body
- Ensure the chicken is centered on the spit
- Tighten all knots to prevent wobbling
When placing the chicken on the spit, do it carefully. Aim for a 5-6 pound chicken for most home setups. Your goal is a perfectly cooked bird with crispy skin and juicy meat.
Temperature Control and Cooking Times
Mastering rotisserie cooking needs precise temperature control. The secret to a perfectly cooked chicken is in the heat and timing. Your rotisserie chicken’s success depends on keeping the right temperature during cooking.
When you’re setting up rotisserie cooking instructions, remember these key temperature tips:
- Optimal cooking temperature range: 350°F to 400°F
- Minimum safe internal temperature: 165°F (USDA recommendation)
- Cooking time: 12-15 minutes per pound
Professional chefs suggest using a meat thermometer for doneness. Stick the probe into the deepest parts of the breast, leg, and wing for even cooking. Different chicken parts have their ideal temperatures:
- White breast meat: 157°F
- Dark thigh and leg meat: 175°F
Pro tip for rotisserie cooking: Check the chicken’s temperature every 5 minutes after the initial cooking time. Remember, carry-over cooking can increase the internal temperature a few degrees after removing the chicken from heat.
Patience and precision are your best tools in achieving the perfect rotisserie chicken.
Basting Techniques for Juicy Results
To make a delicious rotisserie chicken, you need to master basting. This technique keeps your chicken juicy and gives it a golden-brown look. It will make everyone want to try it.

Basting is not just about pouring liquid over your chicken. It’s a careful process that adds flavor and moisture. It makes your rotisserie chicken even better.
Butter-Based Basting Solutions
Butter is a great choice for basting your rotisserie chicken. It makes the skin crispy and adds flavor. Here are some butter-based basting ideas:
- Herb-infused melted butter
- Garlic and rosemary butter blend
- Lemon-herb butter mixture
Timing and Frequency Tips
Getting your basting right is key. Here’s how to do it for the best rotisserie chicken:
- Baste every 20-30 minutes during cooking
- Use a clean basting brush to prevent cross-contamination
- Avoid opening the oven too frequently to maintain consistent temperature
Pro tip: Save the chicken’s drippings (about ½ cup) to make a tastier basting liquid. This trick keeps your rotisserie chicken juicy and full of flavor.
Achieving Crispy Golden Skin
Turning your rotisserie chicken into a masterpiece starts with crispy chicken skin. The key is knowing the right techniques to make it stand out.
To get that perfect crispy skin, you need a plan. Here are the main steps for golden, crunchy results:
- Thoroughly pat the chicken dry before seasoning
- Use a baking powder and salt mixture to enhance skin texture
- Allow chicken to air-dry uncovered for 24 hours
- Rub oil and spices both under and over the skin
Professional chefs say air circulation is key for crispy skin. Dry the skin well and mix salt, baking powder, and baste. This makes the skin golden and crunchy like in a restaurant.
Temperature is also important for crispy skin. Roast at 425°F to crisp the skin without overcooking the meat. Baste every 20 minutes for a deep brown color and to keep it moist.
The optimal crispy chicken skin method combines preparation, seasoning, and precise cooking techniques.
Your aim is a chicken with skin that shatters when cut, showing juicy meat. By using these expert tips, your rotisserie chicken will impress everyone with its looks and taste.
Testing for Doneness and Safety
It’s crucial to make sure your rotisserie chicken is fully cooked. This ensures both great taste and safety. You need to check the temperature and look closely to make sure it’s ready.
Learning how to check if your rotisserie chicken is done is key. The FDA says to aim for a specific internal temperature. This step is important for safety and taste.
Internal Temperature Guidelines
Always follow the temperature guidelines when cooking rotisserie chicken. Here are the important temperatures to remember:
- Breast meat: 165°F (74°C)
- Thigh meat: 175°F to 185°F (80°C to 85°C)
- Wing meat: Clear juices, firm joints
| Chicken Part | Safe Temperature | Texture Indicator |
|---|---|---|
| Breast | 165°F | Firm, white, opaque |
| Thigh | 175-185°F | Golden, tender |
| Wing | 165°F | Flexible joints |
Visual Indicators of Readiness
There are also visual signs to look for:
- Juice color: Clear juices mean it’s cooked well
- Skin appearance: Should be golden-brown and crispy
- Meat texture: Should be firm but not hard
By using these methods, you can serve perfectly cooked, safe rotisserie chicken every time.
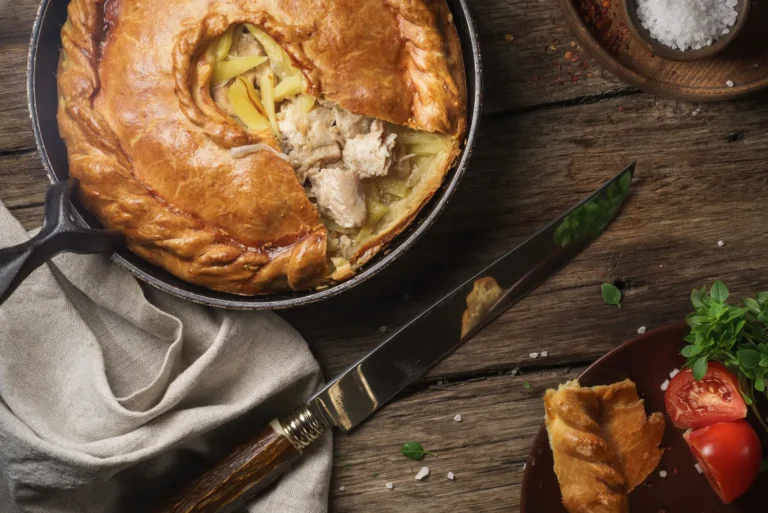
Resting and Carving Instructions

After cooking your delicious quick chicken dinner, the final steps are key. Resting and carving are crucial for a perfect rotisserie chicken. Proper resting ensures each bite is moist and flavorful.
The Importance of Resting
Let your rotisserie chicken rest for 10 to 15 minutes after cooking. This waiting period helps the meat stay juicy. It prevents dryness and keeps the meat tender. Cover the chicken loosely with foil to keep it warm and crispy.
Carving Techniques
To carve your quick chicken dinner well, use a sharp 5- to 6-inch utility knife. Here’s how to make clean, professional cuts:
- Remove legs and thighs by finding the natural joint
- Cut breast meat along the breastbone at a 90-degree angle
- Separate smaller pieces of meat near the carcass
Carving Efficiency Tips
| Carving Technique | Key Recommendation |
|---|---|
| Optimal Carving Temperature | Warm but not hot to prevent meat crumbling |
| Knife Selection | 5-6 inch utility or boning knife |
| Breast Cutting | 90-degree angle along breastbone |
By following these steps, you’ll make your rotisserie chicken look great. It will impress your family and guests.
Best Side Dishes for Rotisserie Chicken
Choosing the right side dishes for rotisserie chicken can make your meal amazing. You can pick from 16 tasty recipes that go well with your chicken. Roasted vegetables are a classic, taking 20-30 minutes to make. They add color and flavor to your plate.
Sweet potatoes are a healthy and tasty choice, full of vitamin C. You can cook them in an Instant Pot for 15 minutes or roast them with your chicken. A fresh Caesar salad, with romaine lettuce, Parmesan cheese, and croutons, is a light and refreshing option.
Potato-based sides are also great with chicken. You can make creamy mashed potatoes or crispy wedges. Start by cooking potatoes in cold water and aim for a golden-brown outside. A tip: microwave potatoes first to save time. These side dish ideas will make your rotisserie chicken meal unforgettable for everyone.